PAN Card
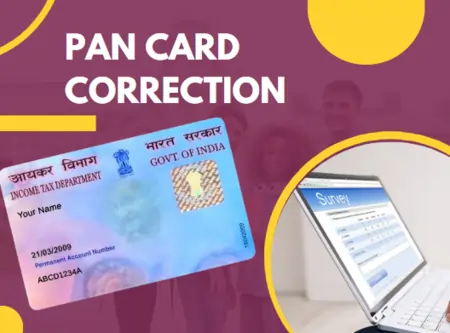
PAN Card Correction
PAN Card correction means changing or correcting the details in a newly delivered PAN card. Correction is mandatory since wrong information in the PAN card or PAN database may lead to grave problems in future transactions.
Possible reasons for PAN correction
Some of the possible reasons for making corrections to the existing details of the PAN card are: -
- Correction of your wrong name/father’s name in a new PAN card
- Correction of your wrong Date of Birth or wrong month for Date of Birth
- Blurred photo in the new PAN card
- Misprint of details in new PAN card
Documents required for PAN card correction
The acceptable documents required for PAN card correction are the same as those mentioned in the PAN card allotment article < blog link>. The following documents are required for making corrections to the existing details of the PAN card: -
- Xerox copy of PAN card/PAN allotment letter
- Xerox copy of Proof of Identity
- Xerox copy of Proof of Birth
- Xerox copy of Proof of Address
- Any other proof in support of the changes you have made.
PAN card correction fees
The fee chart for making corrections to the existing details of the PAN card is given below.
|
S. No
|
Type of
Application
|
Mode of
Submission
|
Fees
Inclusive of all taxes
|
|
1
|
PAN card at Indian Address
|
DD/Online Payment at NSDL website
|
Rs. 110
|
|
2
|
PAN card at Foreign Address
|
DD/Online Payment at NSDL website
|
Rs. 1020
|
|
3
|
PAN card at Indian Address
|
Online Payment on the UTIITSL website
|
Rs. 110
|
|
4
|
PAN card at Foreign Address
|
Online Payment at the UTIITSL website
|
Rs. 910
|
How to apply for PAN card correction?
You can apply for a PAN card correction request online at the NSDL or UTIITSL websites. You can also apply for PAN card correction in the “My PAN” app. You can also send in a completed PAN correction application or walk into any TIN facilitation centers, PAN centers, or UTIITSL branches for PAN card correction. The online procedures are mentioned below.
NSDL PAN Card Correction
- Visit NSDL and Apply for PAN card correction.
- Choose “Changes or Corrections in PAN card data/Reprint of PAN Card (No changes in Existing PAN Data)”as the Application Type.
- Select the appropriate category from Category Type. If the PAN number is registered under your name only, then choose “Individual” as Category Type.
- Fill up all the details and click the checkbox to accept the terms. Enter the Captcha code before clicking on “Submit”.
- On the next page, note down the TOKEN number. The number will also be sent to your mail ID. Proceed with PAN correction by clicking on “Continue with PAN application form”
- Choose how to want to submit your supporting documents: a) e-KYC and e-sign; b) Submit scanned images and e-sign; c) Forward application documents physically. It’s preferable to choose a) or b) if you want to complete the total application online.
- Choose whether you want a physical PAN card. Click “Yes”. Enter your PAN number, Aadhar number and other details. Select checkboxes if your photo/signature has to be changed. You need to enter your “details of Parents” and click the checkbox if you want to change parents’ details before you click on “Next”.
- Enter other details in the “Address “and “Contact details” sections. You need to choose at which address you want your PAN card to be delivered “Residence” or “Office”. You need to mention your residential address even if you opt for “Office”. You need to click the checkboxes if your address or contact details to be changed as well. Mention other PAN numbers if they have been allotted to you.
- In the “Documents Details” section, choose the type of supporting documents you want to submit as POI, POA and Proof of Birth and PAN.
- If you have chosen to upload scanned copies, upload all supporting documents you selected earlier, your photo and your signature before you click on “Submit”.
- You can choose to pay via DD/Paytm/Bill Desk. It’s preferable to choose Paytm or Bill Desk. Accept the terms before you click on “Proceed to Payment”> “Pay Confirm”.
- You will be redirected to the payment portal. Choose your online payment mode and pay the PAN card correction fees.
- When your payment is successful, you will be redirected to a page with all the details of your payment. Click on “Continue” to proceed.
- Click on “OTP validation” for aadhar authentication through OTP. Enter the OTP you received before you click on “Submit”.
- “Continue with e-sign” for aadhar authentication.
- Accept the terms. Enter your aadhar number/VID before you click on “Send OTP”. Enter the OTP you received before you click on “Verify OTP”.
- You can click on “download pdf” to download the Pan Card correction application.
- Print out the form. Paste two colour photos.
- You ought to sign at 3 places:
- On the left photo space, affix the photo and sign across it.
- On the right photo space, paste the photo and sign at the box below the photo.
- On the 2nd page of the form, sign at box provided for the sign at the bottom of the page.
- Send the filled-in online application to 'Income Tax PAN Services Unit, Protean e-Governance Infrastructure Limited, 5th Floor, Mantri Sterling, Plot No. 341, Survey No. 997/8, Model Colony, Near Deep Bungalow Chowk, Pune – 411 016'.
UTIITSL PAN Card Correction
- Visit (utiitsl.com)
- Select “Apply for change/correction in PAN card details”
- Choose how to want to submit your supporting documents: a) e-KYC and e-sign via aadhar e-KYC; c) Forward application documents physically. It’s preferable to choose the aadhar e-KYC option.
- Choose whether you want a physical PAN card and e-PAN or just an e-PAN.
- Enter your PAN number twice before clicking on “Submit”. Note down your reference number.
- Enter all the details and choose the appropriate option before clicking on “Next Step”.
- Click on the checkboxes for Address and Contact details if you want the details to be same as the aadhar details. If you don’t want it, enter the details manually before you click on “Next Step”.
- Select checkboxes if your photo/signature has to be changed. Mention other PAN numbers if they have been allotted to you. Choose the appropriate options in the “Verification” section details before clicking on “Next Step”.
- In the “Upload” section, choose the type of supporting documents you want to submit as POI, POA and Proof of Birth and PAN. Upload the scanned copies of your supporting documents before you click on “Submit”. You can select one kind of document like an Aadhar card to submit for all three sections.
- Click on “Make Payment” and you will be redirected to the payment portal. You can now choose to pay via any of the online modes of payment as per your convenience.
- Enter your mobile number and Email ID again. Choose your mode of Payment before clicking on “Confirm Payment”. You can pay through Bill Desk or Paytm. It’s preferable to choose Paytm.
- Enter your aadhar number/VID before clicking on “Get OTP”.
- Accept the terms. Enter the OTP you received before you click on “Submit”.
- You can click on “download signed PAN form” to download the Pan Card correction application.
- Your revised PAN card will be sent to your communication address within 2 weeks.